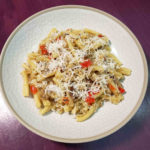
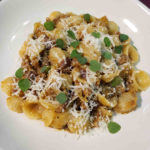
Making your own pasta, from scratch, is an assured method to add love to the dish. Whoever is lucky enough to eat your fresh pasta dish will feel that love. Also, the rolling and cutting of pasta dough is easier done as a couple, making it a great element of a stay-in date night. Oh, besides the love, the texture of fresh pasta is so unique and superior to dried pasta. That’s another good reason to make fresh pasta from scratch.
Egg Dough vs. Semolina Dough
Of all the variations on fresh pasta dough recipes, there are two main categories: egg dough and semolina dough. I talk about this in my A Lot About Pasta article (coming soon). The main thing to know is that egg dough is elastic in nature, where semolina dough is plastic in nature. Elastic egg dough wants to spring back, so it takes a lot of effort to shape it. Plastic semolina dough is malleable, easy to shape and it holds that shape once formed. So, when the plan is to roll the pasta into sheets, and then cut or stuff the pasta, egg dough is the best choice. If the plan is to hand shape pieces of pasta, then a semolina dough is the best choice. This post is all about egg-based pasta dough. There is a sister post, which is all about Semolina Pasta Dough.
Pasta Dough Ingredients
Egg-based pasta dough has at least 2 ingredients: eggs and flour. But there are a few other potential ingredients. It’s good to know what they are and why they are used.
- Flour: Flour is the backbone of the pasta dough. Without flour, you don’t have pasta. Flour is made by finely grinding a grain, usually wheat. In the US we have 4 classes of flour with varying protein (think gluten) levels. The more protein, the more structure the flour provides. In order, lowest to highest, are cake flour, pastry flour, all-purpose flour and bread flour. Cake flour provides the least structure, as the pastry chef wants delicate texture in cakes. Bread flour provides the most structure. Bakers often want their breads to have decent “chew.” Most US recipes for egg based-dough call for either all-purpose or bread flour.
- Note 1: Semolina pasta dough uses semolina flour, which is ground from a unique variety of wheat called durum.
- Note 2: You may come across recipes that call for 00 flour. Unlike the US, Italy distinguishes their flour more by grind than by protein content. 00 flour is the finest grind, and is a finer grind than US flour. Be aware that if you do use 00 flour, you must be careful that it has a high enough protein content to be appropriate for pasta dough.
- Eggs (whole): The flour needs to be hydrated to turn it into a dough. Eggs are 75% water, and egg-based pasta dough relies on that water for hydration. Eggs also add flavor to the pasta. The fat in the egg yolk inhibits the gluten matrix that forms as pasta dough is mixed and kneaded, which results in a more relaxed dough. Also, the protein in the egg white provides structure when the pasta is cooked.
- Egg Yolks: Most of the flavor that eggs give to pasta comes from the yolks. Adding egg yolks to the recipe increases the eggy flavor and it further inhibits the gluten matrix formation. Dough that uses egg yolks is more malleable and easier to roll out and hence may be preferred when hand rolling pasta.
- Water: While semolina pasta doughs use water for hydration, as described above, egg-based dough uses the eggs for hydration. Where water comes into play with egg-based doughs is when you find the dough too dry during the kneading process. If that’s the case, tiny amounts of water are added, usually by simply wetting your hands and continuing to knead.
- Olive Oil: Olive oil behaves much like egg yolks. It adds flavor and it inhibits the development of the gluten matrix.
- Salt: Solely for flavor. Pasta is cooked in salted water. Dry pasta absorbs a lot more of that salted water than fresh pasta does. Fresh pasta starts out moist and only cooks a fraction of the time compared to dried pasta. Adding a little salt to the pasta dough ensures that it will be well seasoned even though it is absorbing less of the salted cooking water.
Ingredient Ratios
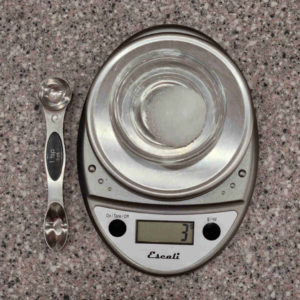
If you look around on the internet you will find many different pasta dough recipes with various ratios of the ingredients above. I tend to keep it simple with flour, whole eggs and a pinch of salt. The lore of making fresh pasta is full of anecdotes saying that every batch of pasta is different. The size of eggs varies, the age of eggs affects their water content, the humidity in the air is variable. I went along with that thinking, and the recommended ratio when working with whole eggs is three eggs to two cups of flour. Add a teaspoon of Diamond Crystal kosher salt for flavor (or 3 grams of any brand of salt). This will make about a pound of fresh pasta (which cooks up to a bit less than what a pound of dry pasta will cook up to because dry pasta absorbs so much more cooking water).
That ratio works out pretty well. If the dough sticks to your hands while kneading, it’s too wet and needs some more flour. Add the flour in very small increments by sprinkling a big pinch onto the dough ball, gently smooth the flour over the surface of the ball, and continue to knead, working the flour into the dough. If the dough ball is too tough to knead or the dough cracks when you knead, it’s too dry and needs some more water. Simply wet your hands, shake them off, and continue kneading with your wet hands. The moisture on your hands will work its way into the dough. Repeat as necessary until you have a dough that is properly hydrated.
The Pursuit of Precise Ratios
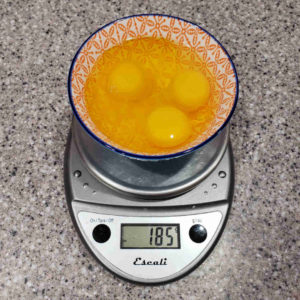
I love precision when I can get it. I started tracking my data. I figured that I could weigh the 2 cups of flour and the three cracked eggs and note whether the result was too dry or too wet. Eventually I’d have enough data to figure out how many grams of flour is optimal for how many grams of eggs. What seemed to be the case was 175 grams of egg and 285 grams of flour was optimal. So, I adopted the process of weighing three cracked eggs, and then multiplying that weight by 1.63 to determine the amount of flour needed. The process was working well, until I bought a different brand of all-purpose flour. With that brand (or maybe just that bag of that brand, on a day when the furnace ran hard and dried out the air in the house…) using the 1.63 ratio resulted in dry dough which needed more water.
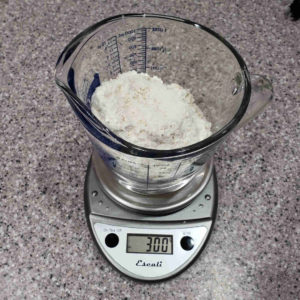
While trying to be precise, my mileage varied. It’s likely to vary for you as well, but you can try to weigh your eggs first, and then multiply by 1.63 to determine the amount of flour. Another method which results in almost the same ratio without doing any math is to start by weighing your three eggs, and then adding enough water to make it to 185 grams total. Then measure out 300 grams of flour. 300 grams to 185 grams is a 1.62 ratio. This is a good starting point, but it’s still not guaranteed. For now, I’m back in the camp of the traditional ratio of 2/3 of a cup of flour per large egg, without weighing anything.
Mixing the Dough
You’ve probably seen some videos showing the traditional preparation of egg pasta dough. It goes something like this: Make a mound of flour on a clean work surface. Hollow out the center of the mound making a well. Crack the eggs into that well. Whisk up the eggs, slowly incorporating flour from the sides of the well, until a loose mess is formed. At this point you get your hands involved and knead for a few minutes until a smooth ball of pliable dough forms and it springs back if you push your finger into it.
I used to teach a fresh pasta class at a cooking school. Batches of 16 students would each get one egg, a 2/3 cup mound of flour, and a fork. Everybody was successful in turning that flour and egg into a little ball of dough. So, you can certainly be successful making egg pasta dough in this traditional method. But it’s a lot of work.
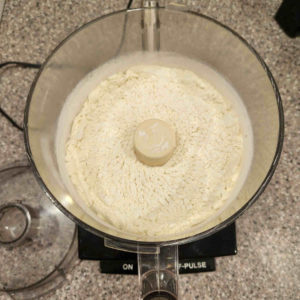
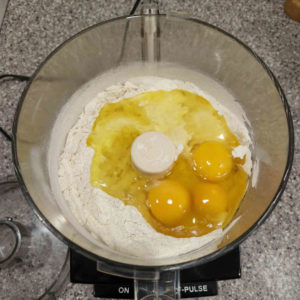
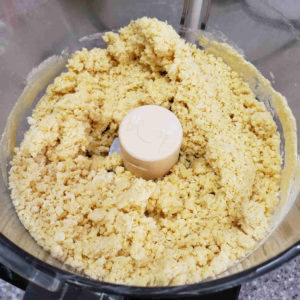
I use a food processor for the bulk of the workload. This makes the task quick and easy. Not only does it bring the dough together, it also quickly develops the dough’s gluten matrix. Some kneading is required, but just a fraction compared to the traditional method. Simply add the flour and the salt to the processor and give it a quick pulse to mix the two. Add the eggs and start processing until things “come together.”
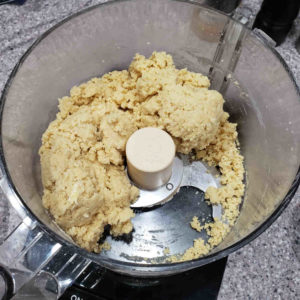
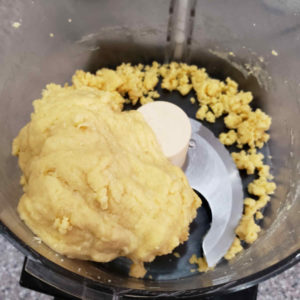
Here’s where the variability shows itself. You are looking for a loose clumping of dough with some pellets of straggling dough that the processor can’t seem to get to join the party. If, instead, you find that nothing comes together and you instead have a bunch of pellets that look like Israeli couscous, then there isn’t enough moisture. This is easy to fix by SLOWLY adding liquid, like half a teaspoon at a time, giving it 15 seconds to incorporate before adding more. Eventually the mix should come together. The opposite problem is if the dough comes together in a tight ball which lodges itself above the blades of the processor. This dough is going to be too wet. This can only be fixed during the kneading process.
Kneading the Dough
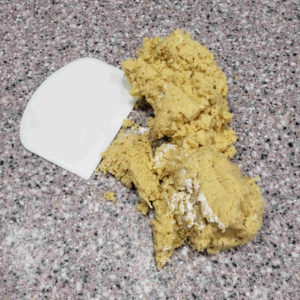
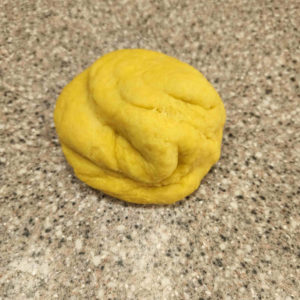
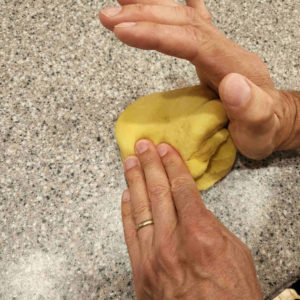
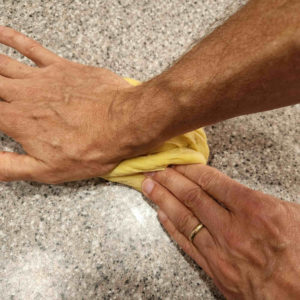
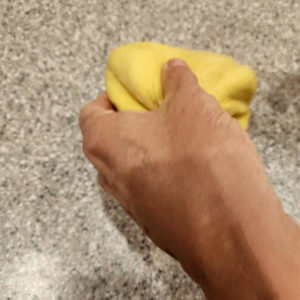
When the food processor has done its job, empty the contents onto a clean working surface and scrape out any bits that are stuck to the sides or blades of the processor. Smoosh, push and roll until you get the dough into a rough blob. From here, different people have different techniques of kneading, but the general idea is to fold part of the dough over top the other part, press them together, give a quarter turn, and repeat. I do this using the palm of my right hand to lift, fold and smoosh the near side of the dough blob over and into the far side. Your method may vary. Just make sure your motions don’t cause any breaks in the dough, and you constantly rotate the attention to different parts of the dough.
As you knead, you may find that your dough is too dry or too wet. If, after a bit of kneading, you find that the dough sticks to your hands and the work surface, it is too wet. Fix this by SLOWLY working extra flour into the dough. Sprinkle a pinch of flour over the dough ball, smooth that flour over the surface of the dough ball and continue kneading. Repeat adding flour until the dough stops sticking. On the other hand, if the dough is difficult to knead, and it cracks as you knead it, the dough is too dry. Fix this by SLOWLY adding water into the dough by wetting your hands, give them a quick shake over the sink, and then continue kneading the dough. Again, repeat adding water this way until the dough starts behaving properly.
Resting the Dough
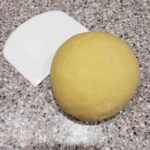
The kneading process generates a really tough gluten matrix. Optimally, you want that gluten matrix to relax before you start working the dough. Two to three hours is optimal. For this type of period, I just leave the tightly wrapped dough ball on the kitchen counter. If it’s going to rest for longer, I move it to the fridge. You can make the dough a day ahead of time, leaving it to rest in the fridge. You can even let it sit in the fridge for multiple days, but the dough will start to discolor with a greyish hue if it sits too long. It’s still perfectly fine to eat, but not the prettiest to look at. Pie dough recipes often include a splash of vinegar, which reduces the discoloration of the dough in the fridge. I’ve never tried it with pasta dough. It may work, but I’m usually preparing the pasta the same day I make the dough.
Rolling and Cutting the Dough
I have a friend who won’t spend the money on any special equipment. The only tools he uses for fresh pasta is a fork for the traditional whisking of the eggs into the flour, a rolling pin to flatten the dough, and a chef’s knife to cut the dough. Frugal. Effective. A lot of work. A lot of love.
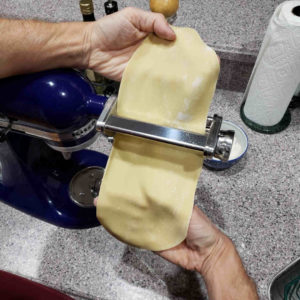
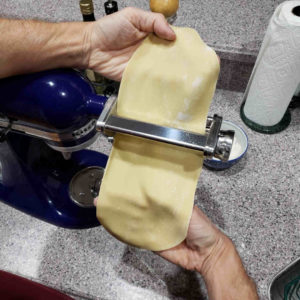
Even a well-rested dough has a resilient gluten matrix. I want to have a pasta roller to help me beat the pasta into submission. You can get a decent hand crank unit for about $40. But I’m really pleased with my set of attachments for my KitchenAid stand mixer. All pasta rollers have a knob to adjust thickness settings. You start by rolling at the thickest setting, and progress until the thickness of the pasta meets your needs. The number of thickness settings and their order vary by manufacturer. For example, my roller’s thickest setting is 8 and it’s thinnest is 0, but I’ve seen others where 1 is the thickest setting and things get thinner as the number increases.
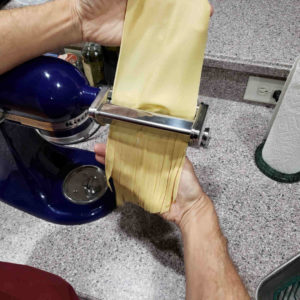
When you roll your pasta, cut off a piece of the dough ball to roll and rewrap the remaining dough. The dough will dry out very quickly as you will see if you don’t take the time to rewrap. There are two main phases of rolling the dough. The first is done with the roller at its thickest setting and it sets the width of sheet of dough. Generally, you want to get the sheet of dough to be fully as wide as the roller allows. To get the dough the right width, you repeatedly send the dough through the rollers at the thickest setting, and fold the dough, kind of like a paper envelope, between rolls. Once you have the width right, you’ll start to switch to thinner and thinner settings. As you roll using thinner settings, the sheet of pasta will grow in length. Generally, you want to run the sheet through the roller two or three times per setting. How thin you go depends on your usage. My favorite noodles are fairly thick, where I stop at “2” and then hand cut half inch wide noodles across the width of the sheet, so I get thick noodles that are about 6 inches by ½ inch. When I use the linguine or spaghetti cutting attachments, I go to the “1” setting. When I am making a stuffed pasta, I sometimes stop at “1” and sometimes I go all the way to “0.”
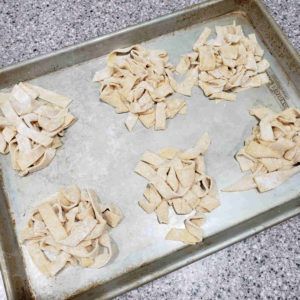
As you roll your pasta, have a small bowl of flour available. I keep a small, covered bowl on my countertop at all times, and refer to it as my “bench flour.” It comes in handy when I’m rolling pasta, shaping pizza dough, rolling dough for a galette, or when I need a quick tablespoon of flour to start a roux. Anyway, if the sheet of pasta feels a little sticky, dust it with a bit of flour. When you cut a sheet of pasta, sprinkle some flour over the cut pasta, tousle the noodles into a nest, and keep individual nests on a baking tray until you are ready to cook.
Cooking the Pasta
Have your sauce ready before you start cooking your fresh pasta. Fresh pasta cooks much faster than dry pasta, and you want to sauce and serve the pasta immediately after it is cooked. Starting with water at a rolling boil, I expect about 4 minutes of cook time. Start with 5 or 6 quarts of water with 5 grams of salt per quart (1/2 tablespoon of Diamond Crystal brand kosher salt). Bring the water to a rolling boil on high heat. Add the pasta, keeping the heat on high. You should see the pasta start to float after a couple of minutes. Some say the pasta is cooked at this point. I like to give it another full minute of cook time. The best way to be certain as to doneness is to fish out a noodle and take a bite. It should be firm with a nice chew. Both undercooking and overcooking fresh pasta leads to softer, less sturdy noodles.
Fresh Pasta (Egg Based)
Equipment
- Food Processor (recommended)
- Pasta Roller (recommended)
Ingredients
- 2 cups all purpose flour see notes
- 3 grams salt see notes
- 3 large eggs see notes
Instructions
Manual Mixing Option
- Make a mound with the flour on a clean working surface, add the salt, stir to loosely mix the salt into the flour.
- Reform the mound, then hollow out the center of the mound to form a well and pour the three eggs into the well.
- Using a fork, whisk the eggs, slowly incorporating flour into the eggs while maintaining the walls of the well. If the wall breaks and the volcano erupts, it's not a terrible thing. Just keep working as best you can.
- Eventually there isn't enough flour remaining to provide a containment well, and the egg/flour mixture is solid enough that you can switch to using your hands to mix things into a loose clump of dough.
Mechanical Mixing Option
- Add the flour and salt in a food processor and give a quick pulse to mix the salt into the flour.
- Add the eggs and turn on the processor. Optimally a loose ball of dough with some straggling pellets gets formed. If pellets form, but they don't come together, drizzle water into the processor a teaspoon at a time. Each time, wait 15 seconds to see if a loose ball is formed. If a tight ball is formed and rides above the blades of the processor, the dough is probably on the wet side. This can be fixed during the kneading process.
Knead the Dough
- Knead the dough by repeatedly folding one portion of the dough over the rest of the dough ball, pressing the dough together, turning one quarter, and repeating.
- If you find that the dough cracks as you knead, more water is required. Add water very slowly by wetting your hands and letting the water from the surface of your hands work into the dough as you continue to knead.
- If you have kneaded the dough substantially and it continues to stick to your hands, the dough is too wet. Add flour very slowly by dusting the outside of the dough ball and working that flour into the dough as you continue to knead.
- Continue to knead the dough until its gluten matrix is well formed. You should find that the dough springs back when you remove your finger after pressing your finger into it.
Rest the Dough
- When you are done kneading the dough, form it into a tight ball and wrap it in plastic wrap. Optimally, allow the dough to rest for two hours before rolling.
Roll and Cut the Dough
- You can roll the dough using a rolling pin (or a wine bottle for that matter), or with a hand crank pasta roller, or with a pasta rolling attachment for a stand mixer. You can cut the pasta with a knife, or with the cutting attachments for the hand crank pasta roller or the stand mixer attachment. This is totally up to you, the equipment at your disposal and your intended application!
Notes
- Different brands and varieties of salt have very different weight to volume ratios. Diamond Crystal brand kosher salt (one of the lightest options) yields about 3 grams per teaspoon.
- There are a lot of variables in the optimal flour to egg ratio, including the level of residual moisture content in the flour and the humidity of the room. There is no perfect measurement. A more precise, but still not guaranteed measurement is to weigh the three eggs and then add enough water to reach 285 grams of liquid weight. Use this with 300 grams of flour. You still may need to make adjustments as described in the recipe, but the odds are more in your favor that the dough will have a correct hydration without adjustment.

